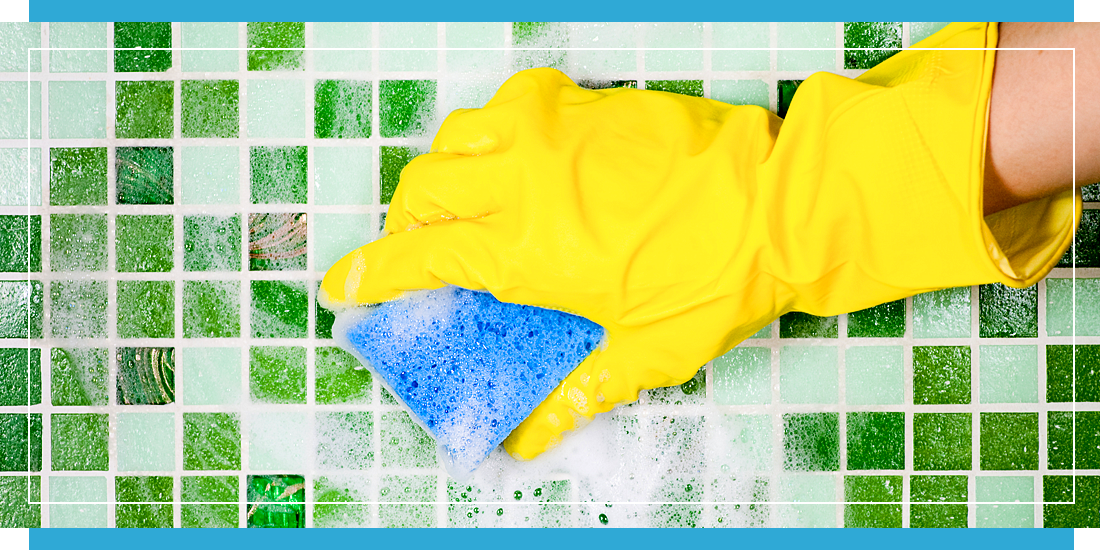
How to Clean Mosaic Tiles Without Damaging Them
Mosaic tiles are often easier to look after than people think, but they do benefit from the right cleaning approach. Because mosaics combine small-format tiles, visible grout lines, and sometimes delicate or natural materials, cleaning them the wrong way can do more harm than good.
The good news is that most mosaic tiles can be cleaned safely and effectively with a few simple habits. Once you understand what the tiles are made from, where they’re installed, and what type of dirt or build-up you’re dealing with, the process becomes much more straightforward.
In this guide, we’ll explain how to clean mosaic tiles safely, what products to avoid, how to care for mosaic grout, and how cleaning methods vary depending on the material. By the end, you’ll know how to keep your mosaic tiles looking their best without risking unnecessary damage.
Key Takeaways
-
Clean mosaic tiles according to the material, not just the format.
-
Use gentle, pH-neutral products wherever possible
-
Avoid abrasive pads, acidic cleaners, and harsh chemicals unless the material specifically allows them
-
Glass mosaics are usually the easiest to maintain, while stone and marble require a little more care.
-
Regular light cleaning is safer and more effective than occasional aggressive scrubbing
-
Grout needs just as much attention as the tile itself
Why Mosaic Tiles Need a Slightly Different Cleaning Approach
Mosaic tiles aren’t difficult to clean, but they are slightly different from larger-format tiles, and that difference matters. Because mosaic surfaces are made up of many smaller pieces, they have more grout lines, more visible detail, and, in some cases, more texture. All of these things influence how dirt, residue, and moisture behave on the surface.
More Grout Lines Means More Surface Detail
With larger tiles, most of what you’re cleaning is the tile face itself. With mosaics, grout becomes a much bigger part of the overall surface. That means soap scum, grease, dust, and general build-up can settle not just on the tile, but also into the grout lines between them.
Different Materials Respond Differently To Cleaning
Another factor is material variation. Mosaic tiles are available in glass, ceramic, stone, marble, metallic finishes, and mixed-material designs, and these don’t all respond to cleaning products in the same way.
A cleaner that works perfectly well on a ceramic mosaic may not be suitable for marble or natural stone, so identifying the material is an important first step before you start cleaning.
Finish and Texture Also Affect Cleaning
The finish of the tile makes a difference, too. Glossy glass mosaics are usually quick to wipe down, while textured stone or matt-finish mosaics can hold onto residue more easily and may need a gentler but slightly more thorough cleaning routine.
The Right Approach Makes All The Difference
This doesn’t mean mosaics are high maintenance. It simply means they benefit from a more informed approach. Once you know what material you’re dealing with and where it’s installed, it becomes much easier to clean mosaic tiles safely and keep them looking good long term.
Our Tiling Experts Say:
“Most cleaning problems we see don’t come from mosaic tiles being hard to maintain. They usually come from using the wrong cleaner for the material, or from leaving build-up too long and then trying to remove it too aggressively.”
Start by Identifying the Material
Before you clean mosaic tiles, the first thing to establish is what they’re made from. This matters because different materials react differently to water, cleaning products, scrubbing, and moisture over time.
Two mosaic surfaces may look similar at first glance, but they can require completely different care. A cleaner that works well on glass or ceramic, for example, may damage natural stone or marble.
If you’re unsure what your mosaics are made from, check the original product information if you have it. If not, it’s best to start with the gentlest cleaning method possible and avoid anything acidic, abrasive, or highly chemical-based until you’re sure.
Glass Mosaic Tiles
Glass mosaics are usually one of the easiest types to clean. Their non-porous surface resists staining, doesn’t require sealing, and tends to wipe down easily with warm water and a soft cloth.
They’re well-suited to bathrooms, showers, and splashbacks because they handle moisture well and don’t absorb residue in the same way as natural materials.
What to avoid when cleaning glass mosaics:
-
Abrasive scourers or harsh scrubbing pads
-
Strong acidic products unless the manufacturer specifically says they’re suitable
-
Anything that could scratch the surface or dull the shine
Ceramic Mosaic Tiles
Ceramic mosaics are also straightforward to maintain. Their glazed finish makes them resistant to staining and generally easy to clean with gentle everyday products.
They’re a practical option for kitchens and bathrooms, especially where you want something low-maintenance and durable.
What to avoid:
-
Harsh abrasive pads that could wear the glaze over time
-
Very aggressive bathroom or kitchen cleaners unless they’re confirmed safe for ceramic tile and grout
-
Leaving greasy or soapy residue to build up for too long
Stone Mosaic Tiles
Stone mosaics need a more careful cleaning approach. Because stone is naturally porous, it can absorb moisture and staining if it hasn’t been sealed properly, and it’s more sensitive to strong chemicals than glass or ceramic.
Textured stone mosaics can also trap residue more easily, so cleaning may need to be a little more thorough while still staying gentle.
What to avoid:
-
Acidic cleaners
-
Bleach-heavy products
-
Strong limescale removers
-
Over-scrubbing with stiff brushes or abrasive pads
Marble Mosaic Tiles
Marble mosaics need some of the gentlest care of all. Marble is a natural stone, but it’s particularly sensitive to acidic products, which can etch the surface and leave dull marks that can’t simply be wiped away.
For that reason, marble mosaics should always be cleaned with a pH-neutral cleaner designed for natural stone, or with plain warm water for light cleaning.
What to avoid:
-
Vinegar
-
Lemon-based cleaners
-
Standard bathroom sprays unless they’re clearly safe for marble
-
Any product designed to cut through limescale using acid
Metallic Mosaic Tiles
Metallic mosaics can vary depending on their construction, so it’s important to be especially careful. Some have a metallic finish over another material, which means harsh cleaners or scrubbing can damage the outer layer.
These mosaics are often best cleaned with a soft cloth and a very mild cleaner, keeping the process simple and controlled.
What to avoid:
-
Abrasive pads
-
Strong degreasers
-
Harsh chemical cleaners
-
Anything that could strip or dull the finish
Mixed-Material Mosaic Tiles
Some mosaic sheets combine more than one material, such as glass with stone, or metal with ceramic. These can be the trickiest to clean because a product that’s safe for one part of the sheet may not be suitable for another.
When cleaning mixed mosaics, it’s safest to choose the gentlest suitable method for the most delicate material in the mix.
Our Tiling Experts Say:
“If your mosaics are made of a mixture of materials and you’re unsure what cleaner to use, always clean for the most sensitive material in the mosaic, not the toughest one. It’s the safest way to avoid accidental damage.”
Safe Everyday Cleaning for Mosaic Tiles
Once you know what material you’re dealing with, everyday cleaning is usually straightforward. In most cases, the safest approach is also the simplest: remove surface residue regularly, use gentle products, and avoid anything that risks damaging the tile or grout.
Start With Warm Water and a Soft Cloth
For light day-to-day cleaning, warm water and a soft microfibre cloth are often enough. This is especially true for glass and ceramic mosaics, which usually don’t need strong products to stay looking clean.
A gentle wipe-down removes:
-
Dust
-
Light splashes
-
Soap residue
-
General surface dirt
This kind of regular cleaning helps prevent build-up from forming in the first place, which is one of the easiest ways to avoid the need for harsher cleaning later on.
Use a pH-neutral Cleaner When Needed
If warm water alone isn’t enough, the next step is usually a pH-neutral cleaner that’s suitable for the material you’re cleaning. These are generally the safest option because they clean effectively without being overly harsh.
They’re especially useful for:
-
Kitchen splashbacks with grease or cooking residue
-
Bathroom mosaics with soap scum or product build-up
-
Floor mosaics that need a more thorough clean
If you’re cleaning stone, marble, or mixed-material mosaics, always make sure the cleaner is specifically suitable for those materials.
Use a Soft Brush For Grout Lines and Textured Surfaces
Because grout lines are more prominent with mosaics, some areas may need more than just wiping. A soft brush, such as a soft-bristled cleaning brush or an old soft toothbrush, can help loosen residue from grout lines and textured surfaces without being too aggressive.
This is particularly helpful for:
-
Shower mosaics
-
Textured stone mosaics
-
Kitchen splashbacks with build-up around grout lines
The aim is to loosen dirt gently, not to scrub aggressively.
Rinse Away Residue Properly
If you use any cleaning product, even a gentle one, it’s important to rinse the surface afterwards with clean water or wipe it down thoroughly. Leaving residue behind can cause streaks, dullness, or a sticky surface that attracts more dirt.
This is especially important in bathrooms and kitchens, where residue can build up quickly if products aren’t fully removed.
Dry the Surface in Wet Areas
In wet rooms, showers, or bathroom walls, drying the surface after cleaning can make a noticeable difference over time. A soft dry cloth or squeegee helps reduce:
-
Water spots
-
Soap residue
-
Limescale build-up
This isn’t always essential after every clean, but in moisture-heavy spaces it can help keep mosaic tiles and grout looking fresher for longer.
Keep the Routine Light but Regular
Regular light cleaning is almost always better than occasional aggressive scrubbing. When dirt and residue are removed little and often, mosaics are easier to maintain, and there’s less temptation to reach for stronger products later.
Our Tiling Experts Say:
“The safest cleaning routine is usually the simplest one. Warm water, a soft cloth, and a pH-neutral cleaner will handle most day-to-day cleaning without putting the finish or grout at risk.”
What Not to Use on Mosaic Tiles
When people damage mosaic tiles during cleaning, it’s usually not because they cleaned too often; it tends to be because they used the wrong product or tool. Even tiles that are otherwise durable can be dulled, scratched, etched, or stained if they’re treated too aggressively.
As a general rule, if a cleaner feels harsh, smells very strongly, or is designed to strip heavy residue quickly, it’s worth checking very carefully before using it on mosaic tiles.
Avoid Abrasive Pads and Scourers
Rough cleaning pads, steel wool, and abrasive scrubbing tools can scratch glossy finishes, wear down protective surfaces, and leave mosaic tiles looking dull over time.
This is especially risky with:
-
Glass mosaics
-
Gloss ceramic mosaics
-
Metallic mosaics
-
Polished stone or marble mosaics
If a surface needs more than a soft cloth, use a soft-bristled brush rather than anything abrasive.
Avoid Acidic Cleaners on Stone and Marble
Acidic cleaners are one of the biggest risks when cleaning natural stone mosaics. Products containing vinegar, lemon, or acid-based limescale removers can etch marble and damage other natural stones, leaving dull patches or marks that can’t simply be wiped away.
This applies particularly to:
-
Marble mosaics
-
Limestone mosaics
-
Other porous or acid-sensitive natural stones
If you’re cleaning stone or marble, stick to pH-neutral cleaners specifically designed for natural stone.
Avoid Bleach-Heavy or Harsh Chemical Cleaners Unless Confirmed Suitable
Some strong bathroom and kitchen cleaners contain bleach or aggressive degreasers that can be too harsh for certain mosaics, grout, or finishes. Even when they don’t immediately damage the tile, repeated use can affect the look of grout or wear down the surface over time.
This is particularly important with:
-
Metallic finishes
-
Natural stone mosaics
-
Mixed-material mosaics
-
Sensitive grout joints
If a product isn’t clearly labelled as safe for your tile material, don’t use it until you’ve checked the manufacturer's guidance or tested it in a small, hidden area first.
Avoid Strong Limescale Removers Unless the Tile Allows Them
Limescale removers can be tempting in bathrooms and showers, but many of them rely on acids or very strong formulations. These may be fine on some ceramic or glass surfaces, but they can be far too harsh for stone, marble, metallic finishes, or certain grout types.
If limescale is an issue, always check that the cleaner is compatible with the tile material first.
Avoid Using the Same Cleaner on Every Mosaic Type
This is one of the most common mistakes people make. A product that works perfectly well on ceramic mosaics may not be suitable for marble, stone, or metallic tiles.
Mosaic tiles should always be cleaned according to the most sensitive material in the surface, not the toughest one.
Avoid Over-Scrubbing
Even with the right cleaner, cleaning too aggressively can cause problems. Excessive scrubbing can wear down grout, scratch surfaces, or force dirt deeper into textured materials rather than lifting it away cleanly.
With mosaics, a gentler method used regularly is almost always safer and more effective than trying to remove everything in one intense clean.
Our Tiling Experts Say:
“If you feel like you need a very strong cleaner to get mosaic tiles looking right again, the issue is often build-up rather than the tile itself. In most cases, a gentler product used properly is a better long-term solution than something aggressive.”
How to Clean Mosaic Tile Grout Without Causing Damage
Grout is often the part of a mosaic surface that shows dirt first, especially in bathrooms, kitchens, and other high-use areas. Because mosaics have more grout lines than larger tiles, keeping grout clean is an important part of maintaining the overall look of the installation.
The key is to clean grout gently but consistently. Over-scrubbing or using the wrong products can do more harm than good, especially if the grout is already slightly worn or the surrounding tile is delicate.
Related: A Guide to Grouting Mosaic Tiles
Start With the Gentlest Method First
For light dirt or everyday build-up, warm water and a soft brush are often enough. A soft toothbrush or soft grout brush can help lift dirt from the joints without being too aggressive.
This is often suitable for:
-
Light bathroom residue
-
Dust and surface dirt
-
Early signs of discolouration
-
General upkeep between deeper cleans
Starting gently reduces the risk of damaging the grout or scratching the surrounding tiles.
Use a Grout-Safe Cleaner Where Needed
If warm water and a brush alone aren’t enough, use a cleaner that is suitable for grout and safe for the tile material around it. This is particularly important with mosaics, because grout lines are close to the tile edges, and any cleaner will inevitably come into contact with both.
If you’re cleaning grout around:
-
Glass or ceramic mosaics: you’ll usually have more flexibility
-
Stone or marble mosaics: you need to be far more careful and avoid anything acidic or harsh
When in doubt, always choose the gentlest grout-safe product that is compatible with the most delicate material in the mosaic.
Use a Soft Brush, Not Force
Grout doesn’t respond well to aggressive scrubbing. A stiff brush or too much pressure can start to wear the surface of the grout, especially if it’s older or has already begun to weaken.
A soft brush used with patience is usually much more effective than trying to force the dirt out quickly. With grout, repeated gentle cleaning is far safer than one harsh deep clean.
Rinse Thoroughly After Cleaning
Any cleaner left in the grout lines can attract more dirt or leave the surface looking dull. Once the grout has been cleaned, wipe or rinse the area with clean water and remove any remaining residue.
This is especially important in showers and splashbacks, where leftover product can build up quickly if it isn’t fully removed.
Let the Grout Dry Properly
Grout often looks darker while it’s wet, so it’s important to let it dry fully before deciding whether it’s clean enough or needs further attention.
This is a small detail, but it stops people from over-cleaning simply because the grout still looks darker immediately after washing.
Sealed Grout is Easier to Maintain
If your grout has been properly sealed, it will generally resist staining and moisture more effectively. Sealing doesn’t make grout maintenance-free, but it can make cleaning easier and help prevent dirt from settling as deeply into the surface.
If grout seems to stain very quickly or stay dirty despite careful cleaning, it may be a sign that resealing is needed rather than more aggressive scrubbing.
Our Tiling Experts Say:
“One of the biggest mistakes people make with grout is trying to scrub it back to clean in one go. Grout usually responds much better to gentle cleaning done regularly than to harsh treatment when it already looks tired.”
Cleaning Mosaic Tiles by Location
The safest way to clean mosaic tiles depends not just on the material, but also on where they’re installed. A mosaic splashback in a kitchen will pick up very different residue from a shower wall or a bathroom floor, so it helps to adjust your cleaning routine to the setting.
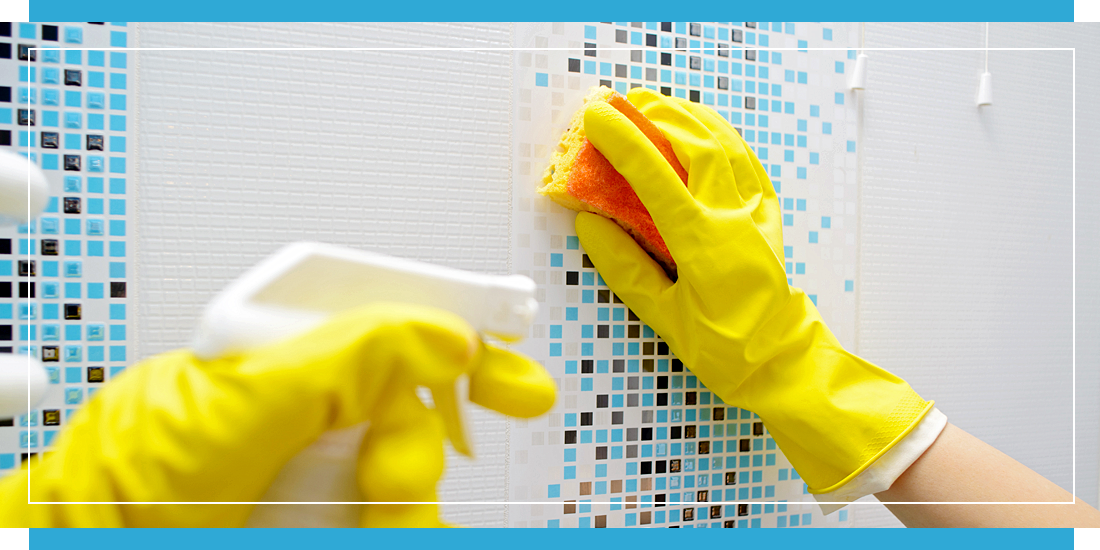
Cleaning Bathroom Mosaic Tiles
Bathroom mosaics are often exposed to:
-
Soap residue
-
Toothpaste splashes
-
Water spots
-
Humidity and condensation
In these spaces, regular light cleaning is usually the best approach. Wiping bathroom mosaics down frequently helps prevent soap scum and water marks from building up, which is much easier than trying to remove them once they’ve settled in.
If the mosaics are around a basin or vanity area, pay particular attention to grout lines, corners, and edges where product residue tends to collect.
Cleaning Shower and Wet Room Mosaics
Shower mosaics and wet room tiles usually need a little more attention because they’re exposed to frequent moisture, soap, shampoo, and limescale. The combination of water and product residue can quickly leave the surface looking dull if it isn’t dealt with regularly.
For shower mosaics, it helps to:
-
Rinse down the surface after use, where possible
-
Wipe or squeegee away excess water
-
Clean lightly and regularly rather than waiting for a heavy build-up
This is especially important if the mosaics include textured finishes or prominent grout lines, where residue can settle more easily.
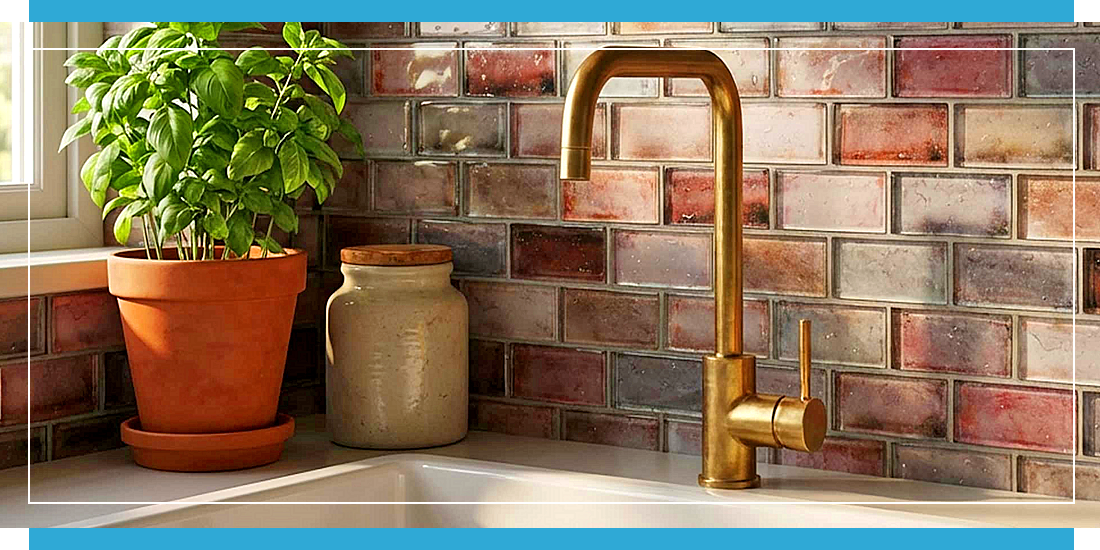
Cleaning Kitchen Mosaic Tiles
Kitchen mosaics are more likely to collect:
-
Grease splashes
-
Cooking residue
-
Food splatter
-
Dust that sticks to oily surfaces
Because of this, kitchen splashbacks often need more frequent wiping than bathroom walls, even if they don’t look obviously dirty at first. Grease build-up can dull the appearance of the tiles and attract more dirt over time if it’s left too long.
A gentle pH-neutral cleaner is often useful here, especially around cookers and hobs, but it’s still important to make sure the product is suitable for the tile material.
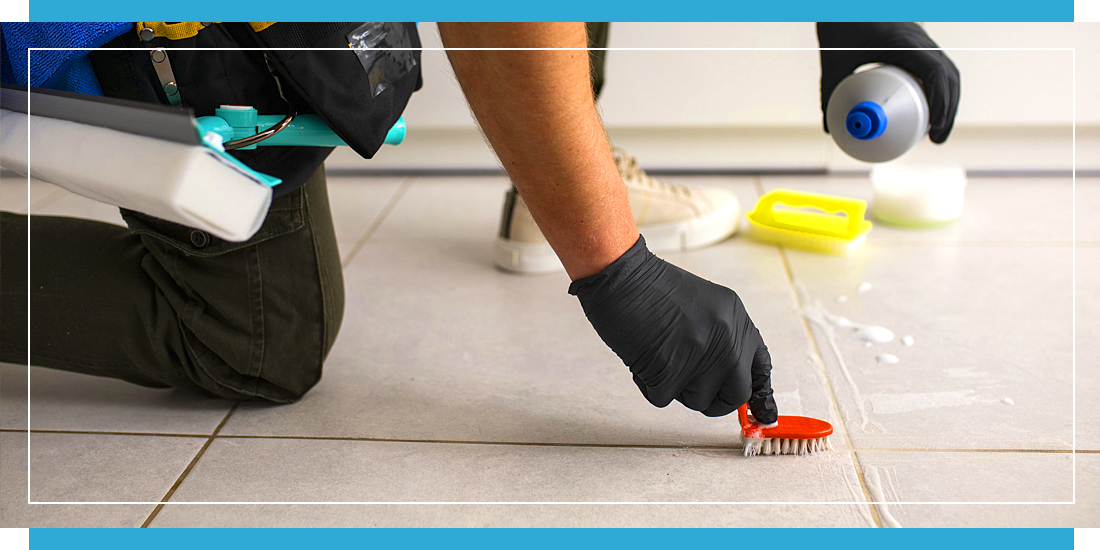
Cleaning Floor Mosaics
Floor mosaics tend to collect loose dirt, dust, and everyday debris more quickly than wall tiles. In bathrooms and wet rooms, they may also be exposed to moisture, soap residue, and foot traffic all at once.
For mosaic floors, it helps to:
-
Remove loose dirt regularly before it gets worked into the grout
-
Use a soft mop or cloth rather than anything abrasive
-
Avoid leaving excess water sitting on the floor after cleaning
Because grout lines are more prominent on mosaic floors, keeping them clean little and often tends to give a better result than infrequent deep cleaning.
Cleaning Swimming Pool Mosaics
Swimming pool mosaics need a slightly different cleaning approach because they’re exposed to constant moisture, pool chemicals, and mineral deposits. Even in indoor pools, residue can build up over time around the waterline or on surrounding tiled areas.
These surfaces may be affected by:
-
Pool chemicals
-
Limescale or mineral deposits
-
Waterline residue
-
General moisture build-up
Related: Swimming Pool Tile Cleaning Guide
Cleaning swimming pool mosaics safely usually means using a cleaner that is suitable for the tile material, safe around pool chemicals, and not overly harsh on grout or surrounding finishes. Gentle, regular cleaning is usually far better than waiting for heavy build-up to form and then trying to remove it with something too strong.
If mosaics are installed in or around a pool, it’s also important to be careful with grout and any surrounding stone or natural finishes, as these may be more sensitive than the tile itself.
Our Tiling Experts Say:
“The best cleaning routine is always the one that matches how the space is actually used. A kitchen splashback, a shower wall, and a mosaic floor may all be tiled in a similar style, but they won’t collect the same kind of dirt or need the same care.”
How to Remove Common Marks and Build-Up Safely
Even when mosaic tiles are cleaned regularly, certain types of residue can still build up over time, especially in the types of places mosaics are most commonly used like kitchens, bathrooms, showers, and pool areas.
The safest way to deal with these marks is to identify what the build-up actually is first, then clean it using the gentlest suitable method for the tile material.
Soap Scum
Soap scum is one of the most common causes of dull-looking mosaic tiles in bathrooms and showers. It tends to sit on the surface of the tile and settle into grout lines, especially where water isn’t wiped away regularly.
For light soap scum:
-
Use warm water and a soft cloth first
-
Follow with a pH-neutral cleaner if needed
-
Use a soft brush around grout lines or textured areas
It’s best to avoid anything overly harsh just to remove a thin layer of residue. Regular cleaning usually prevents soap scum from becoming difficult to remove in the first place.
Limescale and Mineral Deposits
Limescale often appears in areas exposed to hard water, particularly around showers, taps, waterlines, and wet room floors. It can leave a chalky or cloudy residue that makes mosaic tiles look dull.
This is one of the areas where material really matters.
-
Glass and ceramic mosaics: These tiles may tolerate suitable limescale removers, but you should always check the product guidance first
-
Stone and marble mosaics: These materials should never be cleaned with acidic descalers or vinegar-based products
For sensitive materials, it’s safer to use a pH-neutral cleaner and a gentler, repeated cleaning approach rather than trying to remove the build-up in one go.
Grease and Cooking Residue
Kitchen mosaics, especially splashbacks, are prone to grease and fine cooking residue. This can create a sticky film that dulls the surface and attracts more dust or dirt.
To remove this safely:
-
Start with a soft cloth and warm water
-
Use a pH-neutral cleaner or a suitable mild degreasing cleaner if needed
-
Rinse the surface well afterwards so no residue is left behind
Grease is easier to remove when dealt with regularly, before it has time to build up.
Mildew or Mould Around Grout
In damp spaces such as showers or around bath panels, mildew or mould can sometimes appear around grout lines or sealant edges. This usually points to a combination of trapped moisture, poor ventilation, and build-up over time.
If you spot mildew:
-
Clean it as early as possible before it spreads further
-
Use a grout-safe cleaner that is suitable for the surrounding tile material
-
Use a soft brush rather than aggressive scrubbing
-
Make sure the area is rinsed and dried properly afterwards
If mould keeps returning in the same area, the issue may be more about ventilation, worn sealant, or moisture retention than cleaning alone.
General Dullness or Residue Film
Sometimes mosaic tiles don’t look visibly dirty, but they still seem dull or slightly cloudy. This is often caused by cleaning residue, hard water marks, or build-up from repeated product use rather than dirt itself.
In these cases:
-
Wipe the surface with clean warm water
-
Use a soft cloth to remove any residue
-
Dry the surface fully to check the finish once it’s clean
This is often enough to restore clarity, especially on glossy glass or ceramic mosaics.
Our Tiling Experts Say:
“One of the easiest mistakes to make is treating every mark as if it needs a stronger cleaner. In reality, most build-up on mosaic tiles responds better to the right cleaner used gently than to the strongest product you can find.”
How Often Should You Clean Mosaic Tiles?
There’s no single schedule that suits every mosaic surface, because how often you need to clean mosaic tiles depends on where they’re installed, what they’re exposed to, and what material they’re made from. In general, though, regular light cleaning is far better than waiting until dirt or residue has built up enough to need a heavy scrub.
How Often Should You Clean Mosaics in Bathrooms and Showers?
Bathroom and shower mosaics usually benefit from the most frequent attention, simply because they’re regularly exposed to:
-
Water
-
Soap residue
-
Shampoo and body products
-
Humidity and condensation
A light wipe-down once or twice a week is often enough to keep everyday build-up under control, with more regular drying or rinsing helping in moisture-heavy spaces such as showers and wet rooms.
How Often Should You Clean Mosaic Tiles In Kitchens?
Kitchen splashbacks and wall mosaics may need cleaning more often than they appear to, particularly if they’re near a hob or food preparation area. Grease and cooking residue can settle gradually, which means the tiles can start to look dull before they look obviously dirty.
In most kitchens, a quick wipe as needed and a more thorough clean every week or so is usually enough.
How Often Should You Clean Mosaic Tiled Floors?
Mosaic floors tend to collect dirt, dust, and general residue more quickly than wall tiles, especially in bathrooms, entrances, or busy living spaces. Loose dirt should be removed regularly so it doesn’t settle into grout lines or get worked into the surface.
A light cleaning once a week is a good starting point for most mosaic floors, but bathrooms, entrances, and busy family spaces may need more frequent attention depending on how quickly dirt builds up.
How Often Should You Clean Swimming Pool Tiles?
Swimming pool mosaics, even in indoor pools, benefit from regular monitoring and gentle maintenance rather than waiting for obvious build-up around the waterline or on surrounding surfaces. Mineral deposits and chemical residue are much easier to manage when dealt with early.
The Best Routine is Little and Often
The most effective approach is usually a simple, consistent routine:
-
Wipe down surfaces regularly
-
Deal with splashes and residue early
-
Clean grout gently before it becomes heavily marked
-
Avoid letting moisture or build-up sit for too long
This kind of maintenance keeps mosaic tiles looking fresh and reduces the likelihood of needing stronger products later.
Our Tiling Experts Say:
“Mosaic tiles usually stay looking their best when they’re cleaned little and often. By the time a surface looks like it needs a major clean, residue has often been building up for much longer than people realise.”
Common Cleaning Mistakes to Avoid
Mosaic tiles are usually very manageable to clean, but certain mistakes can make the job harder than it needs to be, and in some cases can cause avoidable damage. Most of the issues we see come down to using the wrong product, too much force, or treating every mosaic the same, regardless of material.
Mistake 1: Using the Same Cleaner On Every Mosaic Tile
Not all mosaic tiles respond to cleaning in the same way. Glass, ceramic, marble, stone, and metallic mosaics all have different properties, so a cleaner that works perfectly well on one surface may be unsuitable for another.
This is one of the most common causes of accidental damage, particularly with natural stone and marble.
How to avoid it: Always identify the material first and choose a cleaner that is safe for the most delicate part of the mosaic.
Mistake 2: Scrubbing Too Aggressively
When grout lines start to look dirty or a surface appears dull, it can be tempting to scrub hard in an attempt to bring it back quickly. The problem is that over-scrubbing can wear down grout, dull polished finishes, and scratch delicate surfaces.
This is especially risky with:
-
Marble mosaics
-
Glass mosaics
-
Metallic mosaics
-
Older grout joints
How to avoid it: Use a soft cloth or soft brush and repeat a gentle cleaning process if needed, rather than trying to remove everything in one go.
Mistake 3: Using Acidic Products on Stone or Marble
Acidic cleaners can be one of the most damaging things you can use on natural stone mosaics. Products containing vinegar, lemon, or acid-based descalers may remove residue quickly, but they can also etch the surface and leave dull marks that are very difficult to reverse.
How to avoid it: Use only pH-neutral cleaners that are suitable for natural stone when cleaning marble or stone mosaics.
Mistake 4: Leaving Residue to Build Up for Too Long
Soap scum, grease, hard water marks, and everyday dirt are all easier to remove when dealt with early. Once build-up is left too long, people are more likely to reach for stronger products or scrub harder, which increases the risk of damage.
How to avoid it: Adopt a simple routine of light, regular cleaning rather than waiting until the surface looks heavily marked.
Mistake 5: Treating Grout as an Afterthought
With mosaics, grout makes up a larger part of the finished surface than it does with larger tiles. If grout is ignored, it can quickly affect the overall appearance of the installation, even if the tile itself is clean.
How to avoid it: Clean grout gently and regularly, use grout-safe products, and consider whether the grout may need resealing if it stains very easily.
Our Tiling Experts Say:
“The biggest cleaning mistakes with mosaics usually happen when people panic and try to fix everything at once. Tiled surfaces tend to respond much better to a calm, material-aware approach than to harsh products or aggressive scrubbing.”
When Mosaic Tiles Need More Than Cleaning
Sometimes a mosaic surface still doesn’t look right even after careful cleaning. When that happens, the issue may not be dirt or residue at all. In some cases, what looks like a cleaning problem is actually a sign of worn grout, failed sealant, staining within the material, or a finish that needs more specialist attention.
Being aware of what to look out for here can save a lot of frustration and prevent you from reaching for stronger cleaners when cleaning alone isn’t really the answer.
Worn or Damaged Grout
If grout is cracked, crumbling, deeply stained, or pulling away from the tile edges, cleaning won’t solve the underlying problem. Even if the surface looks cleaner temporarily, damaged grout can continue to trap dirt and moisture and may make the installation look older than it really is.
What to look for:
-
Cracks or gaps in the grout
-
Areas where grout has worn away
-
Persistent dark staining that doesn’t improve with gentle cleaning
In these cases, the grout may need repair, replacement, or resealing rather than more scrubbing.
Sealant or Sealer Failure
Natural stone mosaics and grout often rely on sealers to help resist moisture and staining. If those sealers wear down over time, the surface may start to absorb dirt or moisture more easily, which can make it look dull, patchy, or marked even after cleaning.
What to look for:
-
Water soaking in rather than sitting on the surface
-
Staining that returns quickly after cleaning
-
Uneven darkening in certain areas
If that happens, resealing may be needed once the surface is fully clean and dry.
Deep Staining in Porous Materials
With stone or marble mosaics in particular, some marks can sit below the surface rather than on top of it. When that happens, ordinary cleaning won’t always remove them because the issue isn’t residue on the tile's surface but staining absorbed into the material.
This is one reason why spills, stains, and residue should be cleaned away as early as possible on porous mosaics, especially in kitchens, bathrooms, and other moisture-prone areas.
Residue From Installation or Previous Cleaning
Sometimes the problem isn’t day-to-day dirt at all. Haze from grout, leftover adhesive residue, or cleaning product build-up can all leave mosaics looking cloudy or patchy long after installation.
What to look for:
-
A dull film that doesn’t shift with normal wiping
-
Uneven patches across the surface
-
Areas that look cloudy rather than dirty
In these cases, the right solution is often a targeted treatment, such as removing grout haze, clearing product residue, resealing the surface, or repairing worn grout, rather than simply using a stronger everyday cleaner.
Damage to the Tile Finish
If a mosaic has been cleaned in the past with the wrong product or scrubbed too aggressively, the surface itself may already be affected. Glossy tiles may look dull, metallic finishes may appear worn, and stone surfaces may show etching rather than dirt.
When the finish has been damaged, cleaning won’t restore it because the problem isn’t dirt, but a change to the surface itself. In some cases, restoring the appearance may require repair, refinishing, or replacing the affected section.
Our Tiling Experts Say:
“If a mosaic still looks patchy, dull, or stained after careful cleaning, the issue may not be dirt at all. In many cases, it’s worn grout, product build-up, or a surface that needs resealing rather than more aggressive cleaning.”
A Simple Cleaning Routine for Mosaic Tiles
If you’re not sure where to start, the safest approach is usually a simple one. Most mosaic tiles don’t need heavy-duty cleaning products or aggressive scrubbing, just a method that removes dirt and residue without putting the surface or grout at risk.
Step 1: Remove Loose Dirt or Dust
Before using any water or cleaner, remove loose dust, crumbs, or debris from the surface. On walls, this may simply mean a dry wipe with a soft cloth. On floors, a soft brush, vacuum with a suitable attachment, or gentle sweep usually works well.
This helps prevent loose grit from being dragged across the surface during cleaning.
Step 2: Wipe the Surface With Warm Water
For many mosaic tiles, especially glass and ceramic, warm water and a soft microfibre cloth are enough for day-to-day cleaning. This is often all you need for light marks, dust, or fresh residue.
At this stage, the aim is simply to lift surface dirt gently before deciding whether anything stronger is actually needed.
Step 3: Use a pH-neutral Cleaner if Needed
If warm water alone doesn’t remove the build-up, use a pH-neutral cleaner that is suitable for the tile material. This is usually the next step for things like:
-
Soap scum in bathrooms
-
Grease in kitchens
-
General dullness on splashbacks or floors
Apply the cleaner according to the instructions, and avoid overusing it. More product doesn’t necessarily mean a better result.
Step 4: Clean Grout Lines Gently Where Needed
If grout lines still look marked, use a soft brush to loosen dirt gently. A soft toothbrush or soft-bristled cleaning brush usually works well.
Focus on the areas that need attention rather than scrubbing the whole surface aggressively. With mosaics, patience is usually more effective than force.
Step 5: Rinse or Wipe Away Residue
Once the surface is clean, wipe it down with clean water or a fresh cloth to remove any remaining cleaner. This helps prevent streaks, residue film, or a sticky surface that attracts more dirt afterwards.
Step 6: Dry the Surface in Moisture-Heavy Areas
In showers, bathrooms, and around waterlines, drying the surface after cleaning helps reduce water spots, soap residue, and mineral build-up. A soft dry cloth or squeegee is usually enough.
A Quick Tile Cleaning Routine to Remember
For most mosaic surfaces, the basic cleaning routine is:
-
Remove loose dirt
-
Wipe with warm water
-
Use a pH-neutral cleaner if needed
-
Brush grout lines gently if needed
-
Rinse and dry the surface
Our Tiling Experts Say:
“If you keep the routine simple and regular, mosaic tiles are usually very easy to maintain. It’s when cleaning gets left too long that people feel they need stronger products, and that’s often when problems start.”
Keeping Mosaic Tiles Looking Their Best
Mosaic tiles don’t need complicated cleaning routines, but they do benefit from the right approach. In most cases, keeping them looking their best comes down to a few simple things: knowing what material you’re cleaning, using gentle products, and dealing with residue before it has a chance to build up.
The main thing to remember is that mosaic tiles should be cleaned according to their material and setting, not just their format. A glass mosaic in a shower, a marble mosaic on a feature wall, and a ceramic mosaic splashback may all look similar at first glance, but they won’t always respond to the same products or methods.
When cleaning is done little and often, mosaics are usually very easy to maintain. It’s when surfaces are neglected for too long, or cleaned too aggressively, that problems tend to start. A soft cloth, warm water, and the right cleaner for the material will usually do far more good than harsh products used in frustration.
With a bit of care and consistency, mosaic tiles can stay clean, fresh, and well-finished for years, without needing anything complicated or damaging in the process.
FAQs About Cleaning Mosaic Tiles
Mosaic Village Is Rated 'Excellent'
 Don't just take our word for it. Hear what our customers have to say!