FAQ Guide:
Mosaic Tiles
For Shower Areas
Mosaic tiles have long been a popular choice for enhancing the aesthetic appeal and functionality of showers. Their versatile designs, durability, and range of materials make them ideal for both modern and traditional settings.
In this FAQ guide we’ll provide answers, information and insights to address a range of queries people often have about using mosaic tiles in shower spaces, including bathrooms, wetrooms and pool areas.
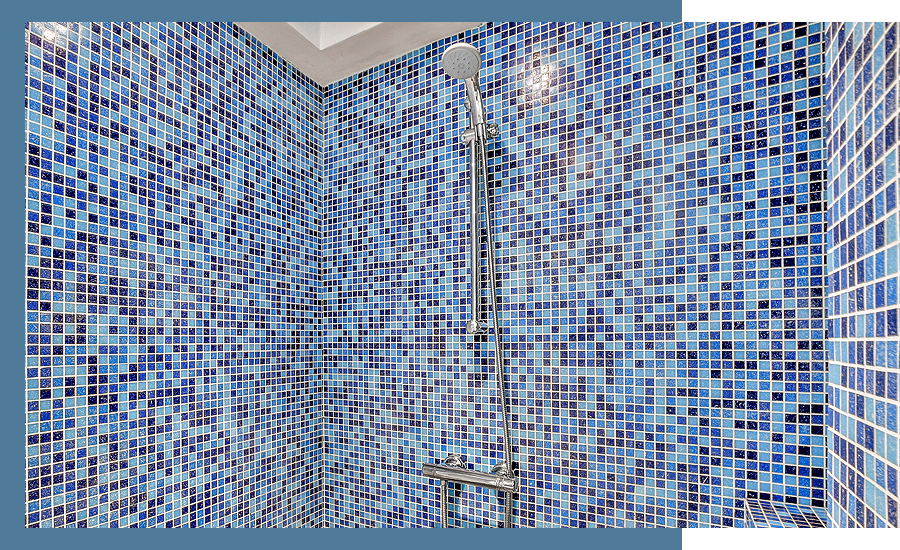
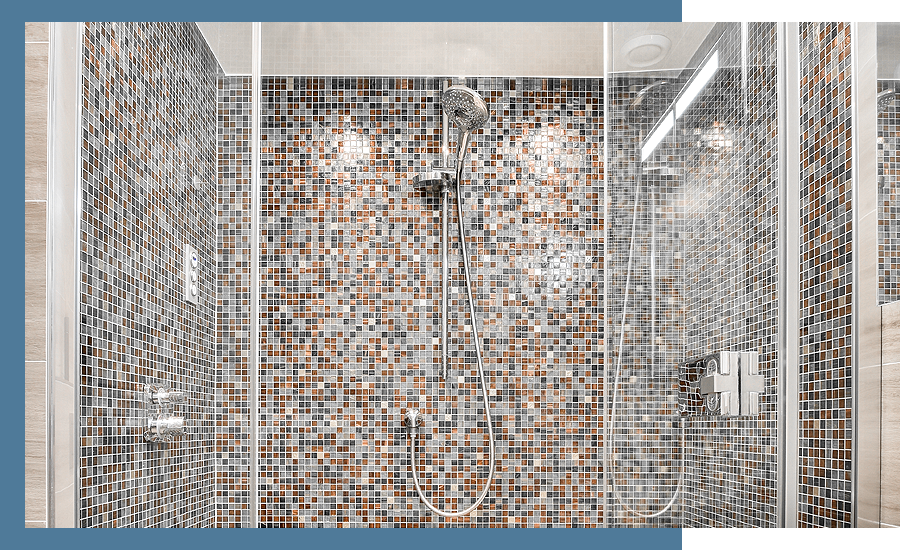
1. Are Mosaic Tiles Good for Showers?
Yes, mosaic tiles are an excellent choice for showers due to their versatility and aesthetic appeal. Their small size and variety of materials, such as glass, ceramic, and porcelain, make them highly adaptable to different design styles and layouts.
These tiles are inherently water-resistant, which is crucial for preventing water damage and mould growth in shower areas. Certain types of mosaic materials provide natural slip resistance, enhancing safety, while grout lines between mosaic tiles also offer additional grip, making them a safer option compared to larger, smoother tiles.
The wide range of colours, shapes, and patterns available allows for endless design possibilities. This makes them perfect for smaller spaces, and enables homeowners to create unique and visually appealing shower areas.
2. Can You Use Mosaic Tiles on Shower Floors?
Yes, mosaic tiles can be used on shower floors and are a popular choice to use for this purpose. They offer several advantages along with a few drawbacks. Here’s a detailed look at the pros and cons:
Pros of Using Mosaic Tiles on Shower Floors
-
Slip Resistance: Compared to larger tiles, the higher number grout lines between mosaic tiles provide extra grip, reducing the risk of slipping, which is essential in wet areas like showers.
-
Design Flexibility: Mosaic tiles come in a variety of colours, shapes, and materials, allowing for creative and unique designs that can enhance the overall look of your shower.
-
Easy to Fit in Small Spaces: Due to their small size, mosaic tiles are ideal for covering curved or irregular surfaces, making them a versatile option for intricate shower floor designs.
-
Durability: High-quality mosaic tiles, especially those made from porcelain or glass, are highly durable and can withstand constant exposure to water and humidity.
Cons of Using Mosaic Tiles on Shower Floors
-
Maintenance: The increased number of grout lines can make mosaic tiles more challenging to clean, as grout tends to attract dirt and mildew.
-
Installation Complexity: Installing mosaic tiles, particularly over larger spaces, can be time-consuming and requires precision to ensure the tiles are evenly spaced and level.
-
Cost: Depending on the material and design, mosaic tiles can be more expensive than larger tiles. The cost of professional installation can also be higher due to the complexity of the work.
-
Potential for Damage: While durable, the smaller individual tiles can be more prone to damage if heavy objects are dropped on them compared to larger, thicker tiles.
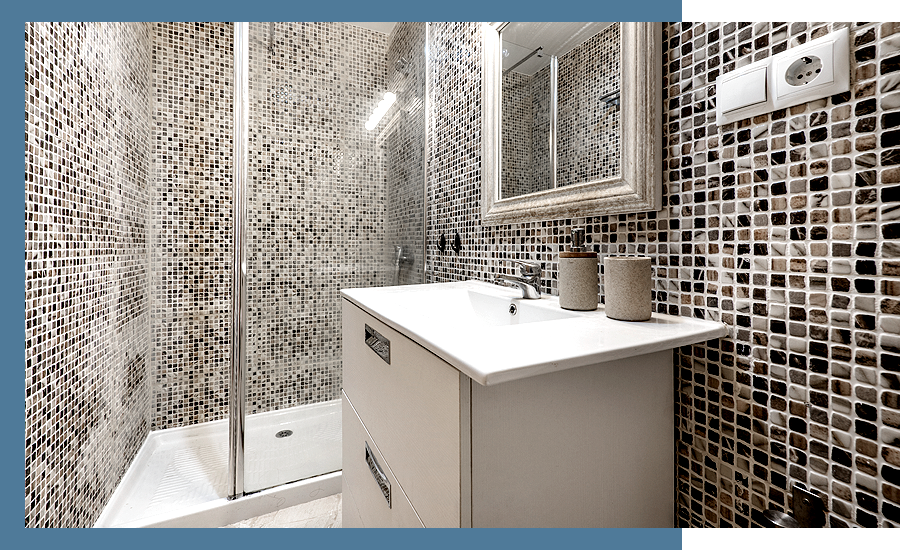
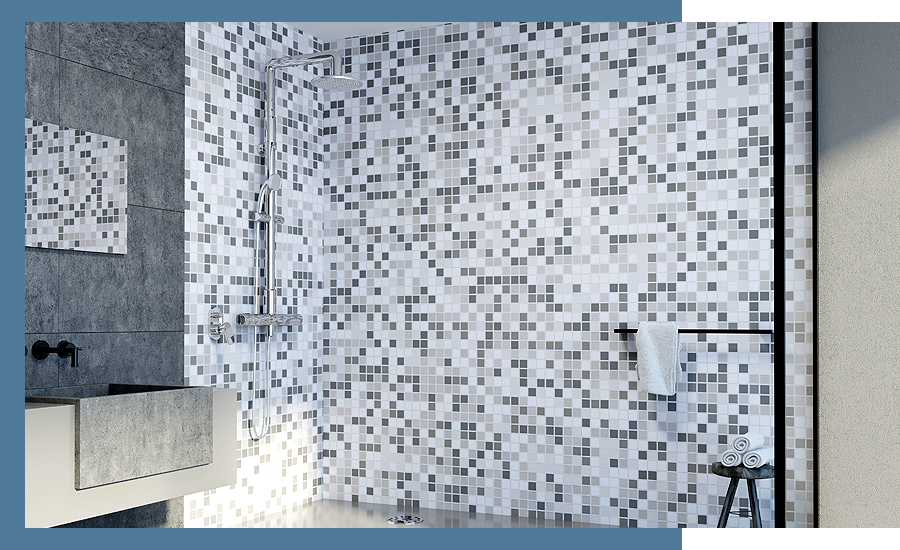
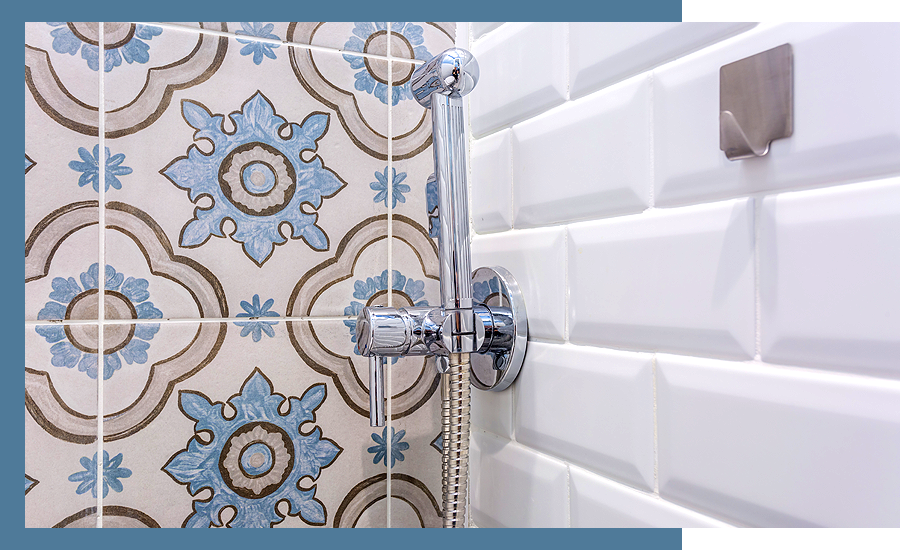
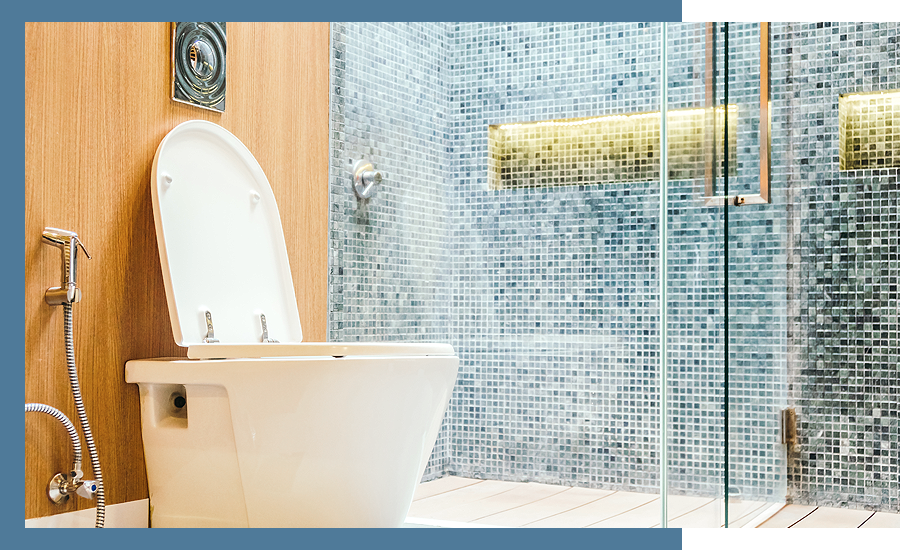
3. Can You Use Mosaic Tiles on Shower Walls?
Yes, mosaic tiles are an excellent choice for shower walls, offering numerous benefits that enhance both the functionality and aesthetics of your bathroom.
Aesthetic Appeal
Mosaic tiles come in a vast array of colours, shapes, and materials, allowing you to create stunning and unique designs that can serve as a focal point in your bathroom. Whether you prefer a modern, sleek look or a more traditional, intricate pattern, mosaic tiles offer a range of colour combinations and provide endless design possibilities to match your style.
Versatility
Able to be installed in a range of ways from intricate patterns to simple grids, mosaic tiles are a versatile choice that can be used in almost any shower space. Their small size also makes them perfect for covering curved or irregular surfaces, ensuring a seamless and professional finish on shower walls.
Durability
High-quality mosaic tiles, especially those made from materials like porcelain or glass, are highly durable and resistant to the constant moisture and temperature changes in a shower environment. This ensures that your shower walls will maintain their beauty and functionality for years to come, even with regular exposure to water and humidity.
Water Resistance
Mosaic tiles are inherently water-resistant, which is vital for preventing water damage and mould growth in shower areas. Their water resistance ensures that the shower walls remain protected, preserving the integrity of the underlying structure and maintaining a hygienic environment.
Visual Depth
The varying colours and reflective properties of mosaic tiles can add depth and dimension to your shower, making the space appear larger and more luxurious. This visual depth enhances the overall atmosphere of your bathroom, creating a more inviting and aesthetically pleasing space. The play of light on the tiles can also create a dynamic and vibrant look, adding to the overall appeal.
Customisation
Mosaic tiles allow for high levels of customisation. You can mix and match different tiles to create a personalised look that perfectly fits your taste and bathroom decor. This customisation ensures that your shower walls are unique and tailored to your preferences, giving you the freedom to design a bathroom that truly reflects your style and personality.
4. How Do You Clean Mosaic Tiles in a Shower?
Keeping mosaic tiles clean in a shower is essential for maintaining their beauty and ensuring a hygienic environment. Here is a step-by-step guide on how to clean mosaic tiles effectively, along with recommended cleaning products and tools.
Step-by-Step Cleaning Guide
-
Initial Rinse: Begin by rinsing the shower walls and floor with warm water to remove any loose dirt and soap scum. This helps to prepare the surface for deeper cleaning.
-
Apply Cleaning Solution: Spray a suitable tile cleaner or a homemade solution of equal parts water and white vinegar onto the mosaic tiles. Avoid using harsh chemicals that can damage the tiles or grout. Allow the solution to sit for a few minutes to break down any grime and build-up.
-
Scrub the Tiles: Use a soft-bristle brush or a non-abrasive sponge to scrub the tiles gently. Focus on the grout lines where dirt and mildew tend to accumulate. For tougher stains, a paste made of baking soda and water can be applied and scrubbed gently.
-
Rinse Thoroughly: After scrubbing, rinse the tiles thoroughly with warm water to remove all cleaning residues. Make sure to wash away any cleaning solution completely to prevent streaks and residue build-up.
-
Dry the Tiles: Use a squeegee to remove excess water from the tiles, then wipe them down with a soft, dry cloth. This step helps to prevent water spots and mildew growth.
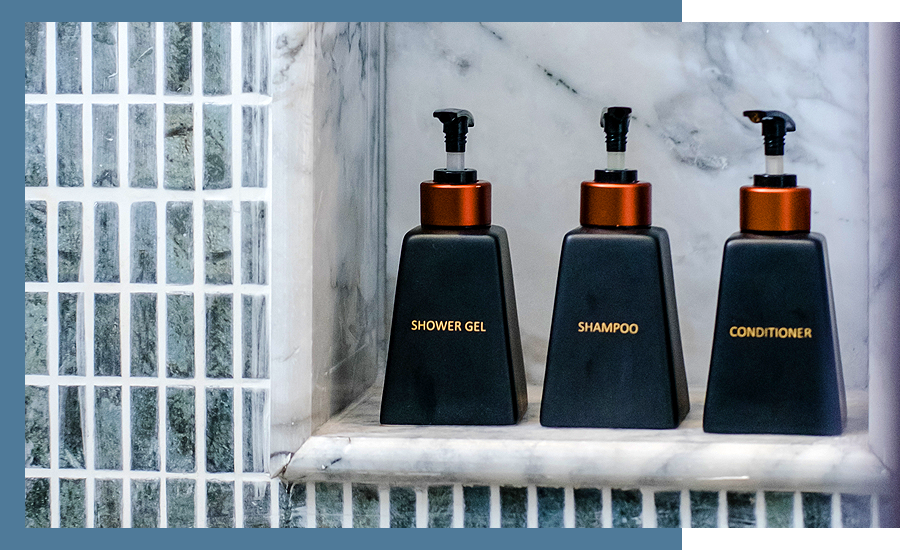
Recommended Cleaning Products and Tools
-
Mild Tile Cleaners: Products like Cif Power & Shine Bathroom Cleaner or Method Bathroom Cleaner are gentle yet effective for regular cleaning.
-
White Vinegar: A natural and effective cleaner that helps to remove soap scum and mildew without damaging the tiles.
-
Baking Soda: Ideal for scrubbing tough stains and grime when mixed with water to form a paste.
-
Soft-Bristle Brush: Helps to clean the grout lines without scratching the tile surface.
-
Non-Abrasive Sponge: Useful for scrubbing the tiles gently.
-
Squeegee: Essential for removing excess water after rinsing.
-
Microfibre Cloth: Perfect for drying tiles and preventing water spots.
5. What Tile Material Should I Use in a Shower?
Choosing the right tile material for your shower is crucial for ensuring durability, water resistance, and aesthetic appeal. Here are some excellent options to consider:
Glass Mosaic Tiles
Durability
Good
Water Resistance
Very High
Maintenance
Easy to clean, non-porous
Aesthetic Options
Reflective, wide range of colours and finishes
Safety
Can be slippery; best for walls
Glass mosaics add a sophisticated and modern touch to shower spaces with their reflective properties and vibrant colours. These tiles are highly resistant to moisture, stains, and bacteria, making them a hygienic option. They are particularly effective in making small bathrooms appear larger and brighter. However, glass tiles can be slippery when wet, so they are typically recommended for shower walls rather than floors.
Ceramic Mosaic Tiles
Durability
Good
Water Resistance
High
Maintenance
Easy to clean, may need periodic resealing
Aesthetic Options
Wide range of colours, patterns, and finishes
Safety
Slip-resistant options available
Ceramic mosaic tiles are a versatile and cost-effective option for shower walls and floors. They are available in a myriad of colours, patterns, and finishes, allowing homeowners to personalise their bathroom designs easily. These tiles are durable and easy to clean, making them a practical choice for wet environments. Ceramic tiles also come in slip-resistant varieties, enhancing safety in the shower.
Porcelain Mosaic Tiles
Durability
Excellent
Water Resistance
Very High
Maintenance
Low maintenance, easy to clean
Aesthetic Options
Wide range of colours and textures
Safety
Generally slip-resistant
Porcelain mosaic tiles are known for their durability and superior water resistance compared to ceramic tiles. They are dense, less porous, and can withstand heavy foot traffic and daily wear and tear. Porcelain tiles are available in various designs, while their low maintenance and high resistance to scratches and stains make them ideal for shower walls and floors.
Stone Mosaic Tiles
Durability
Excellent
Water Resistance
High, with proper sealing
Maintenance
Requires regular sealing and maintenance
Aesthetic Options
Unique, natural beauty with distinct textures and patterns
Safety
Can be naturally slip-resistant but needs proper treatment
Stone mosaic tiles, including marble, offer a unique and luxurious aesthetic. Each tile features distinct textures and patterns, providing a bespoke look to any shower. While natural stone is durable and adds an earthy elegance, it requires regular sealing to prevent water damage and maintain its appearance.
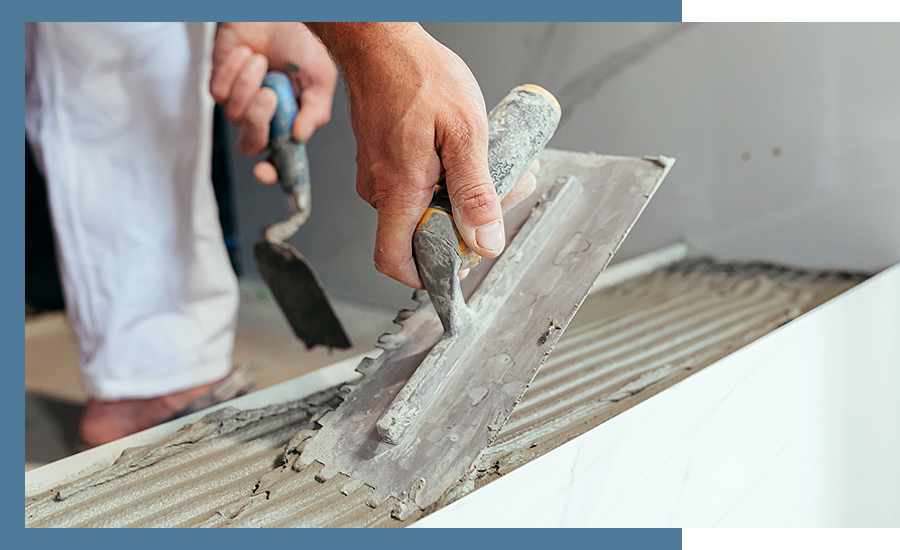
6. How Do You Install Mosaic Tiles in a Shower?
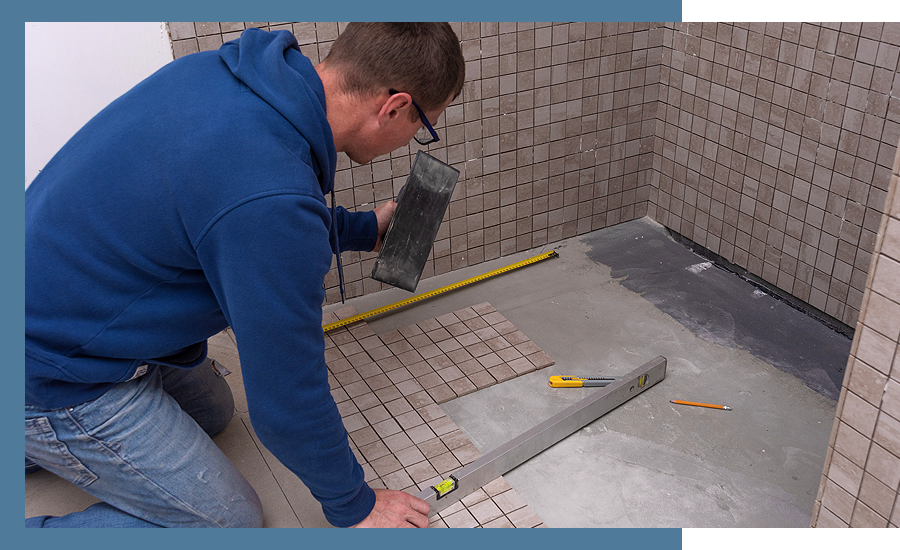
Installing mosaic tiles in a shower requires careful preparation and attention to detail to ensure a professional and durable finish. Here are the basic steps and considerations for a successful installation:
Basic Steps for Installing Mosaic Tiles:
-
Preparation:
-
Clean the Surface: Ensure the shower walls and floor are clean, dry, and free of any old adhesive or grout. Smooth surfaces are essential for proper tile adhesion.
-
Waterproofing: Apply a waterproof membrane to the shower area to prevent moisture from penetrating the walls and floor. This step is crucial for protecting the underlying structure from water damage.
-
-
Planning the Layout:
-
Measure and Mark: Measure the shower area and mark the centre point. Use these measurements to plan the layout of the tiles, ensuring even placement and minimising cuts.
-
Dry Fit: Lay out the mosaic tiles on the floor to visualise the pattern and make any necessary adjustments before adhering them to the walls and floor.
-
-
Applying Adhesive:
-
Choose the Right Adhesive: Use a high-quality adhesive suitable for mosaic tiles and wet environments. Thin-set mortar is a common choice for its strong bonding properties.
-
Spread the Adhesive: Using a notched trowel, spread the adhesive evenly on a small section of the wall or floor. Work in sections to prevent the adhesive from drying out before the tiles are placed.
-
-
Setting the Tiles:
-
Place the Tiles: Gently press the mosaic tiles into the adhesive, ensuring they are level and properly aligned. Use tile spacers to maintain consistent spacing between tiles.
-
Tap with a Rubber Float: Use a rubber float to tap the tiles into the adhesive, ensuring good contact and eliminating air pockets.
-
-
Cutting the Tiles:
-
Trim as Needed: Use a tile cutter or wet saw to cut the mosaic tiles to fit around fixtures, edges, and corners. Make precise cuts to maintain the overall design and pattern.
-
-
Grouting:
-
Mix the Grout: Choose a grout suitable for the tile material and shower environment. Mix the grout according to the manufacturer's instructions.
-
Apply the Grout: Using a rubber float, apply the grout diagonally across the tiles, pressing it into the joints. Wipe off excess grout with a damp sponge, being careful not to remove grout from the joints.
-
Clean the Surface: After the grout has set, clean the tile surface with a damp sponge to remove any grout haze. Allow the grout to cure according to the manufacturer's instructions.
-
-
Sealing:
-
Seal the Grout and Tiles: Once the grout is fully cured, apply a sealant to protect against moisture and stains. This is especially important for natural stone tiles.
-
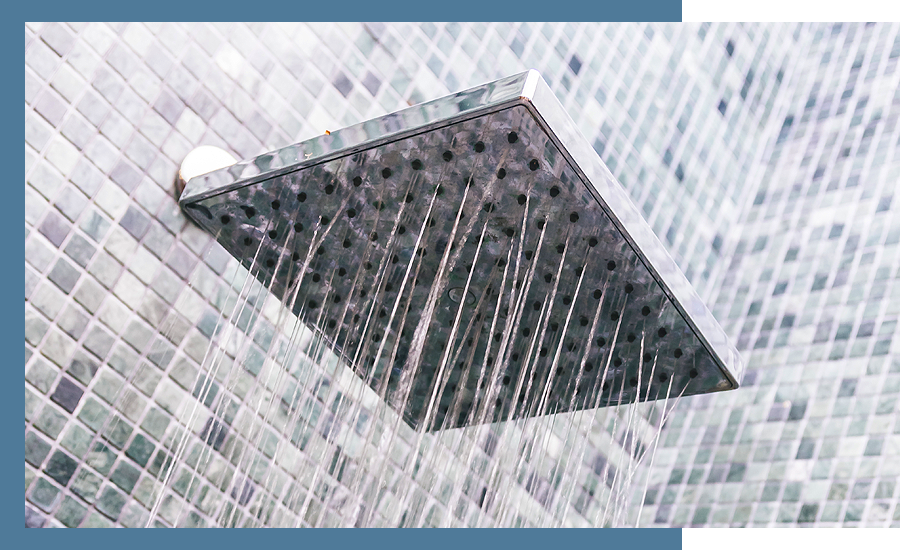
6. How Do Mosaic Tiles Affect Shower Safety?
Mosaic tiles enhance shower safety primarily through increased traction and slip-resistance. The small size of mosaic tiles results in numerous grout lines, which create a textured surface that helps prevent slipping. The grout lines also aid in water drainage, reducing the risk of water pooling on the floor.
The textured surface of many mosaic tiles provides extra grip underfoot, further enhancing safety. Proper maintenance, including regular cleaning to prevent soap scum and mould build-up, is essential to maintain their slip-resistant properties. Overall, selecting the right mosaic tiles can contribute significantly to a safer shower environment.
7. Are Mosaic Tiles Slippery When Wet?
Mosaic tiles can be slippery when wet, but various factors should be considered when assessing suitability for a shower space. The abundance of grout lines between the small tiles provides additional traction, which helps to reduce slipperiness compared to larger tiles with fewer grout lines.
The material and finish of the mosaic tiles are fundamental to how slippery they will be when wet. For example, textured ceramic and porcelain mosaic tiles offer better grip than smooth glass tiles. Natural stone mosaics often have inherent textures that provide additional slip resistance.
Regular cleaning and maintenance are essential to prevent soap scum and mould build-up, which can make any tile surface more slippery. Ensuring that the tiles and grout are in good condition will maintain their slip-resistant properties.
8. How Do You Waterproof Mosaic Tiles?
Waterproofing mosaic tiles in a shower is essential to prevent water damage and ensure the longevity of the installation. Here are the steps and considerations for effectively waterproofing mosaic tiles:
-
Surface Preparation:
-
Clean the Surface: Ensure that the substrate (walls and floor) is clean, dry, and free from dust, grease, or any other contaminants. A clean surface allows for better adhesion of the waterproofing materials.
-
-
Apply a Waterproof Membrane:
-
Liquid Waterproofing Membrane: Apply a liquid waterproofing membrane to the entire shower area. This can be painted or rolled on and forms a seamless waterproof barrier. Follow the manufacturer's instructions for application and drying times.
-
Sheet Membrane: Alternatively, you can use a sheet membrane. This involves adhering sheets of waterproof material to the substrate using a suitable adhesive. Overlap the edges to ensure there are no gaps.
-
-
Seal Joints and Corners:
-
Reinforce Joints: Use waterproof tape or additional layers of liquid membrane to reinforce joints, corners, and any seams. These areas are prone to leaks and require extra attention.
-
Apply Silicone Sealant: Apply a high-quality silicone sealant to all corners and joints to ensure a watertight seal.
-
-
Tile Installation:
-
Use Waterproof Adhesive: When installing the mosaic tiles, use a waterproof adhesive designed for wet areas. Apply the adhesive evenly using a notched trowel.
-
Set the Tiles: Place the mosaic tiles onto the adhesive, pressing them firmly to ensure good contact. Use tile spacers to maintain even grout lines.
-
-
Grouting:
-
Choose Waterproof Grout: Use a waterproof grout to fill the gaps between the mosaic tiles. Epoxy grout is an excellent choice for showers due to its waterproof and durable properties.
-
Apply Grout: Spread the grout over the tiles using a rubber float, pressing it into the spaces between the tiles. Wipe off excess grout with a damp sponge, and allow it to cure according to the manufacturer’s instructions.
-
-
Seal the Grout:
-
Grout Sealer: Once the grout has cured, apply a grout sealer to protect it from moisture and stains. This step is particularly important for cement-based grouts, which are more porous.
-
Considerations for Effective Waterproofing
-
Quality Materials: Always use high-quality waterproofing products, adhesives, and grouts specifically designed for shower installations.
-
Professional Installation: If you are unsure about any part of the process, consider hiring a professional. Proper waterproofing is critical to prevent leaks and water damage.
-
Regular Maintenance: Periodically inspect the grout and sealant for any signs of wear or damage, and reapply sealant as necessary to maintain the waterproof barrier.
9. Are Mosaic Tiles Harder to Install Than Other Tiles?
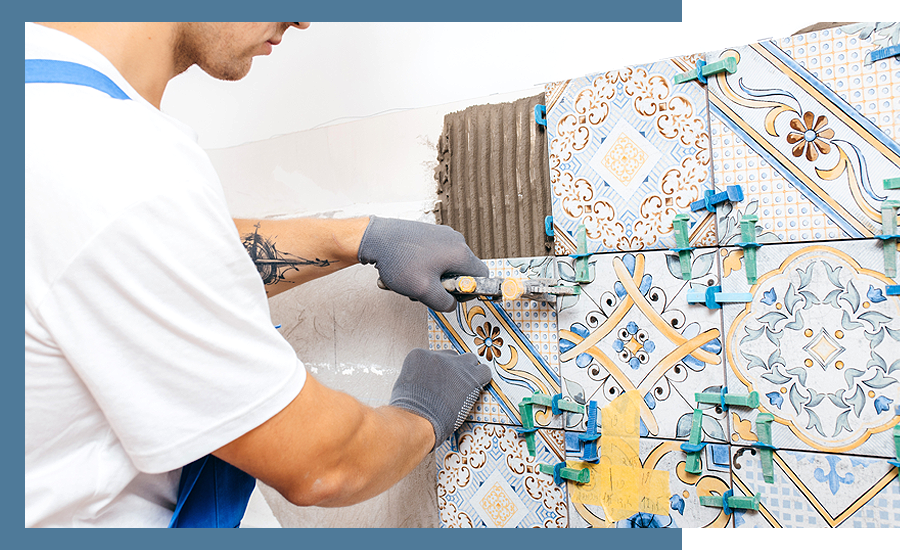
Many mosaic tiles are supplied in sheets to help aid installation. This means that rather than installing mosaics tile by tile, sheets of multiple tiles can be installed together. Mosaic tiles can be easier to install around curves or other irregular shapes due to their size and flexibility, however for large surfaces they may require more time to install.
Here are some techniques and tips to use when installing mosaic tiles:
Proper Preparation
Ensure that the surface is clean, dry, and smooth before applying adhesive. Any debris or irregularities can affect the adhesion and alignment of the tiles.
Use a High-Quality Adhesive
Use a high-quality, non-sag thin-set mortar specifically designed for mosaic tiles. This type of adhesive provides a strong bond and resists slippage. Mix the adhesive to the right consistency as per manufacturer’s instructions. It should be thick enough to hold the tiles but still spreadable. Apply the adhesive evenly with a notched trowel, creating ridges that help hold the tiles in place.
Work in Small Sections
Only apply adhesive to small sections of the wall or floor at a time. This prevents the adhesive from drying out before the tiles are set and allows for better control over tile placement. Place the mosaic tiles onto the adhesive and press firmly. Adjust as necessary to ensure they are level and properly aligned.
Use Tile Spacers
Insert tile spacers between the mosaic sheets to maintain consistent grout lines and prevent the tiles from shifting. This also helps in keeping the tiles evenly spaced and aligned. For vertical installations, spacers help keep the tiles from sliding downward due to gravity.
Tape the Sheets
Use painter’s tape to hold the mosaic sheets in place, especially on vertical surfaces. Apply the tape across the tiles to secure them until the adhesive sets. Once the adhesive has set partially, carefully remove the tape before grouting.
Use a Level and Rubber Float
Continuously check the alignment and level of the tiles using a spirit level. Adjust as needed to ensure a flat and even surface. Use a rubber float to gently press the mosaic tiles into the adhesive, ensuring good contact and reducing the chance of sliding.
Start from the Bottom
When tiling walls, start from the bottom and work your way up. This provides a stable base and helps prevent the upper tiles from sliding down.
10. How Do You Grout Between Mosaic Tiles In Showers?
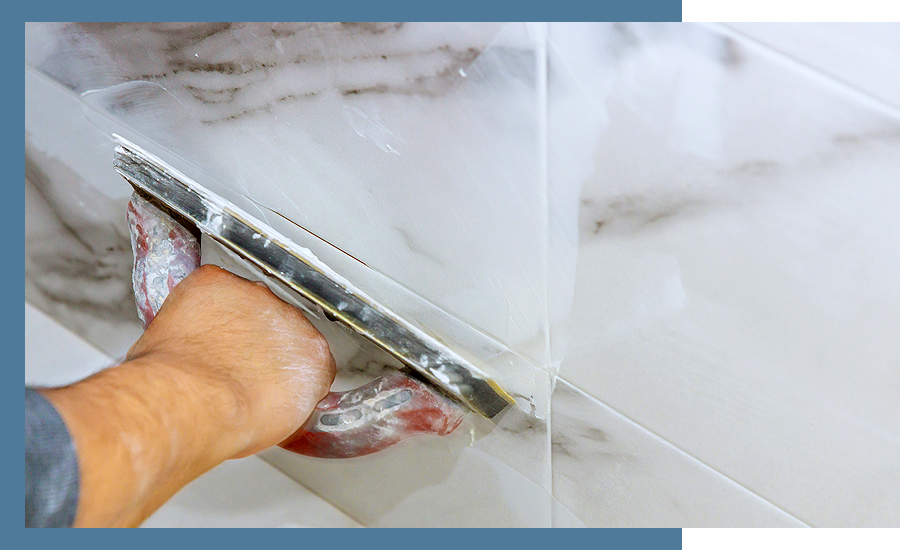
Grouting mosaic tiles in showers involves several steps to ensure a durable and aesthetically pleasing finish:
Start by confirming that the tiles are clean, dry, and securely attached. Mix the grout to a creamy consistency and apply it using a grout float, pressing it into all the gaps.
Wipe off excess grout with a damp sponge, ensuring that the grout fills the spaces evenly. Once the grout has dried, remove any haze with a cloth.
Applying a grout sealer is essential in showers to protect against moisture and stains, ensuring longevity and easy maintenance. Proper grouting helps maintain the integrity and appearance of the mosaic tiles in a wet environment like a shower.
11. What Tile Should Not Be Used in a Shower?
Certain tiles are unsuitable for use in showers due to their porous nature, inability to withstand constant moisture, or lack of slip resistance. Avoid using the following types of tiles in shower areas:
-
Unglazed Ceramic Tiles: These tiles are porous and can absorb water, leading to damage and mould growth.
-
Natural Stone Tiles Without Proper Sealing: Stones like limestone and travertine can absorb water if not sealed properly, causing staining and deterioration.
-
Highly Polished Floor Tiles: These can be very slippery when wet, posing a safety hazard.
12. Can You Put Mosaic Tiles Over Existing Shower Tiles?
It’s usually recommended to remove all old tiles before installing new tiles, particularly in a shower space where moisture may have penetrated behind the tiles while could compromise the durability and performance of the surface. However, installing mosaic tiles over existing shower tiles is possible, but several important steps must be followed to ensure a durable and secure installation.
-
First, the existing tiles need to be thoroughly cleaned, dried, and checked for stability—any loose or damaged tiles should be repaired or replaced.
-
Next, roughen the surface of the existing tiles with sandpaper to help the new adhesive bond effectively.
-
Use a high-quality adhesive designed for tile-over-tile applications, and apply it evenly before setting the mosaic tiles.
-
Proper grouting and sealing of the new tiles are crucial to prevent water infiltration and ensure the longevity of the installation.
-
Use a high-quality adhesive designed for tile-over-tile applications, and apply it evenly before setting the mosaic tiles.
13. What Causes Mosaic Tiles To Lift Near Showers?
Mosaic tiles can lift near showers due to several factors:
Improper Adhesive Application
Improper adhesive application is a common cause of mosaic tiles lifting near showers. Using the wrong type of adhesive or not applying it correctly can result in poor bonding between the tiles and the substrate. If the adhesive is applied unevenly, it can leave gaps under the tiles where water can seep in, weakening the bond over time.
Moisture Infiltration
Inadequate waterproofing can allow water to penetrate the surface and reach the adhesive layer. This constant exposure to moisture can degrade the adhesive, causing it to lose its grip on the tiles. Proper waterproofing techniques, such as using a waterproof membrane and sealing all joints and edges, are essential to protect the adhesive from water damage and prevent tile lifting.
Substrate Issues
The condition and preparation of the substrate play a vital role in the durability of mosaic tile installations. An unstable or improperly prepared substrate can lead to movement and shifting, causing tiles to lift. The substrate must be clean, dry, and stable before tile installation. Any cracks or irregularities should be repaired, and the surface should be primed to ensure a strong bond between the substrate and the adhesive.
Thermal Expansion
Rapid temperature changes, common in shower areas, cause materials to expand and contract. If the installation does not accommodate these movements, it can lead to stress on the tiles and adhesive, eventually causing the tiles to lift. Using flexible adhesives and grouts that can absorb and adapt to these changes can help prevent this issue, while leaving small gaps for expansion can also help to mitigate the effects of thermal expansion.
14. How Do I Repair Shower Wall Mosaic Tiles?
Repairing shower wall mosaic tiles requires careful steps to ensure a seamless and durable fix. First, assess the damage by identifying loose, cracked, or missing tiles and determine if the underlying substrate is affected. Carefully remove the damaged tiles using a chisel or putty knife, taking care not to damage surrounding tiles, and clean the area thoroughly to remove debris and old adhesive.
Next, apply a thin layer of tile adhesive to both the back of the new tiles and the substrate, ensuring even coverage. Press the new tiles into place, aligning them with the existing tiles. Once the adhesive has cured, mix and apply grout to the gaps around the new tiles using a grout float, pressing it into all joints. Wipe off excess grout with a damp sponge and allow it to dry. Finally, apply a grout sealer to protect against moisture and stains, particularly important in shower areas to maintain the repair's integrity.
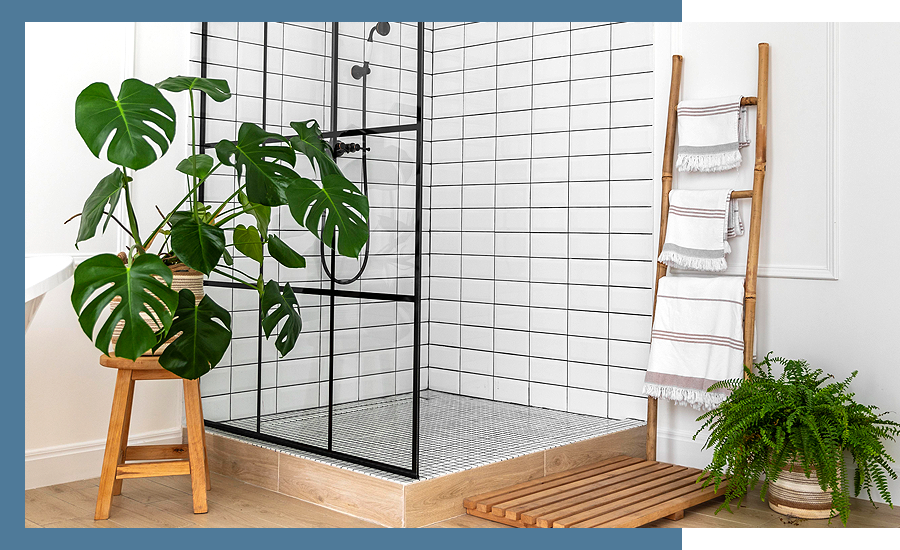
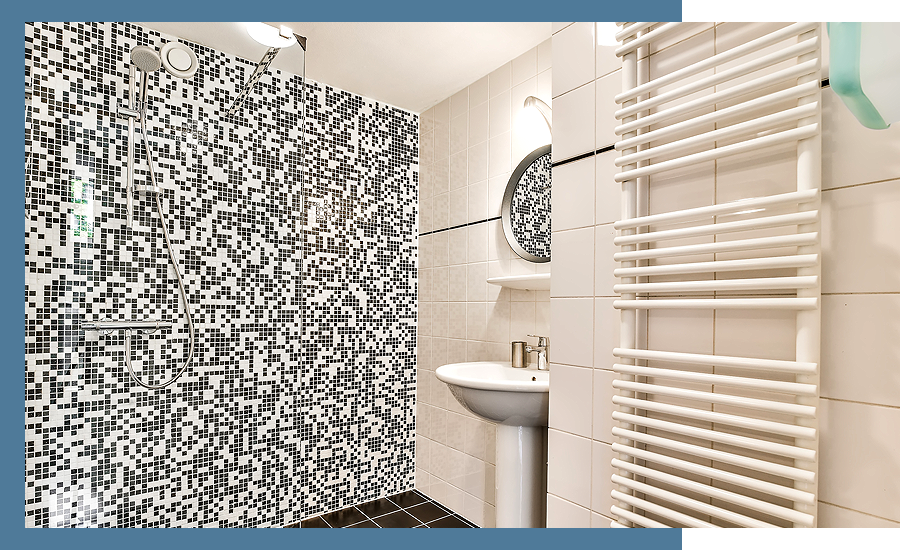
Upgrade Your Shower Space With Mosaic Tiles
Mosaic tiles are a versatile and stylish option for shower installations, and are available in a huge range of styles to suit almost any preference. They can make shower spaces feel more open and luxurious while providing a range of practical benefits.
Explore our wide range of bathroom mosaics and swimming pool mosaics that are suitable for shower spaces, or contact us for expert advice and assistance in selecting the perfect tiles for your project.